A Simple Plan for Every At-Bat
- Before the pitch, decide where you want the ball. You do not need to cover everything.
- Track speed and movement first. Move the cursor only when the pitch enters your plan.
- Use Normal Swing for coverage. Use Power Swing when the count and location justify the smaller cursor.
- After the pitch, identify one cause: pitch selection, cursor placement, timing, or swing choice.
Start with the Strike-Zone Display
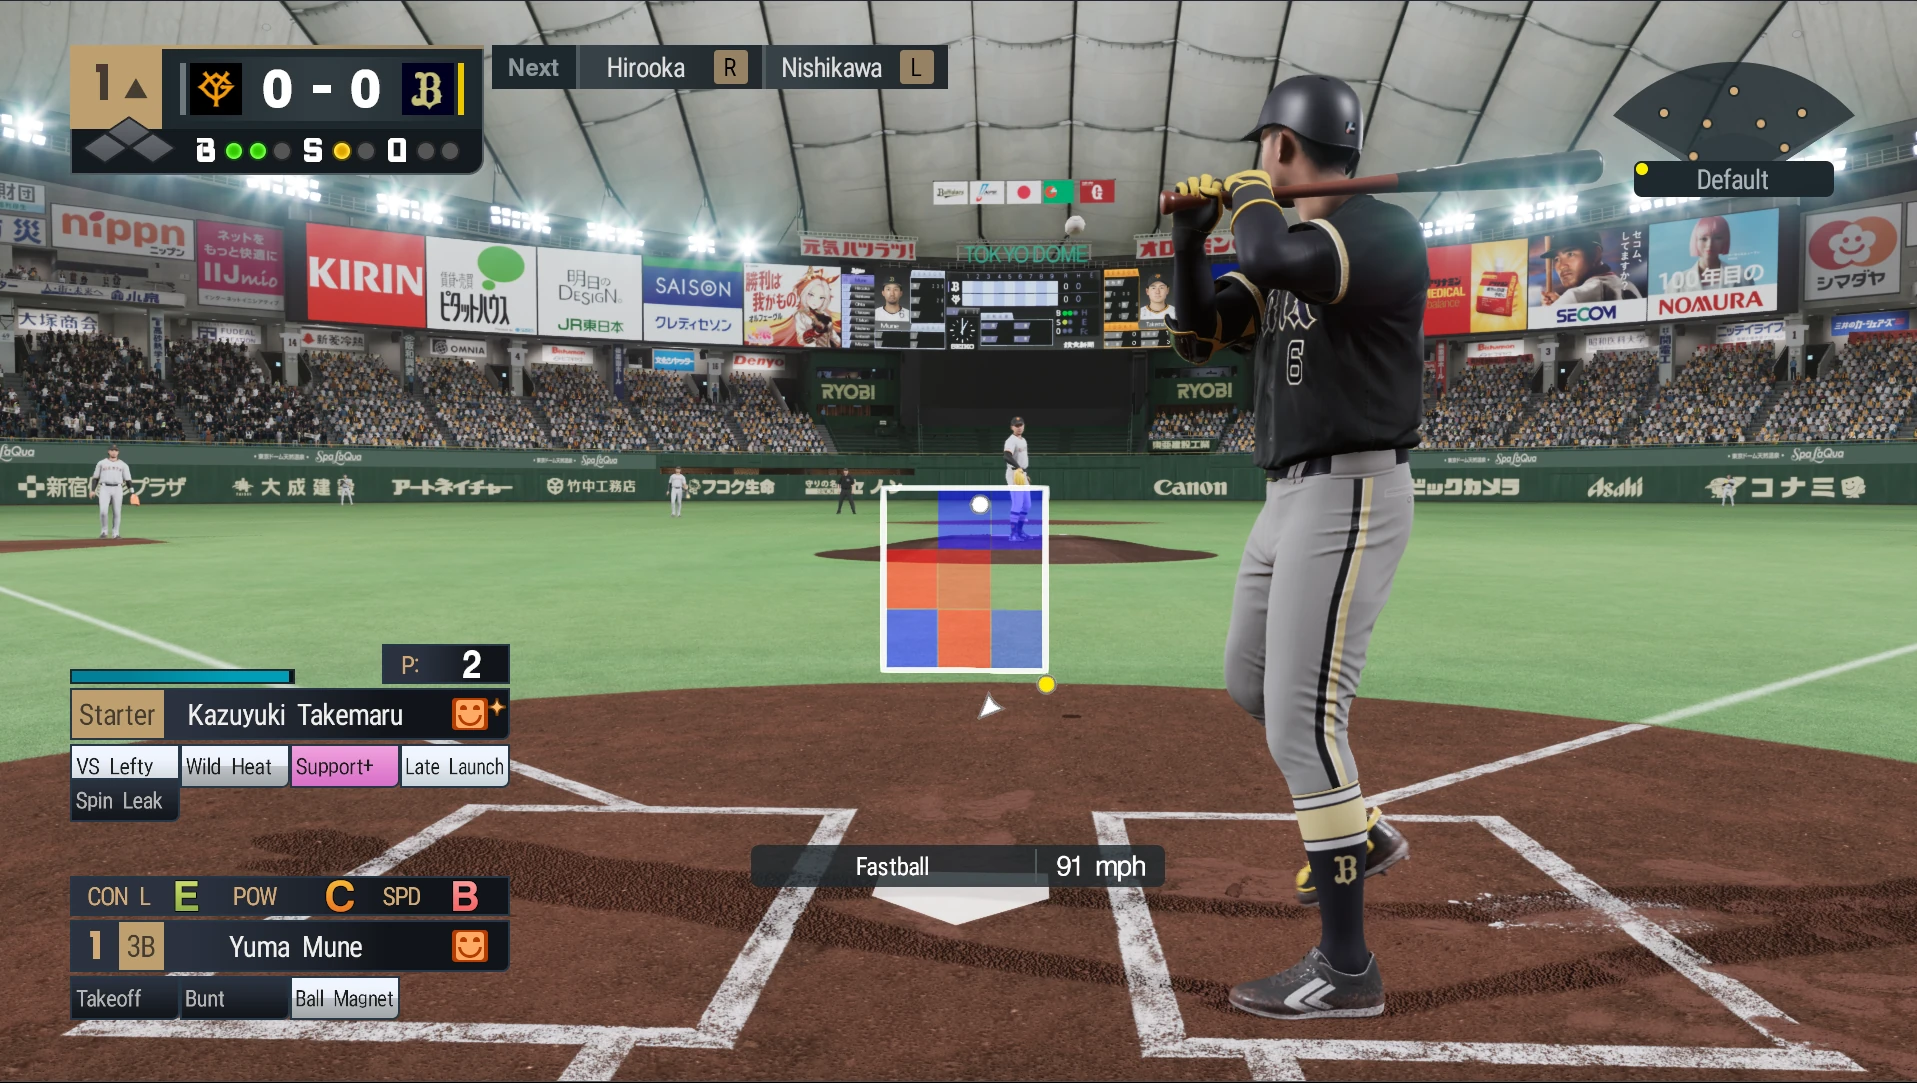
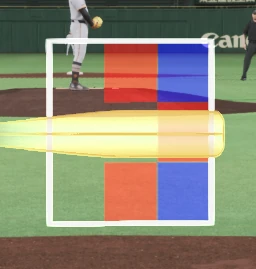
The white outline is the strike zone. The colored areas belong to the batter: red locations improve contact, while blue locations reduce it. Build the at-bat around one hittable area instead of trying to protect the entire screen.
- Watch the small ball marker as the pitch becomes readable.
- Attack a red or neutral area you expected.
- Take pitches that pull you into a weak blue area unless the count forces you to protect.
Step 2: Choose Normal or Power Before the Pitch
R1 switches the batting cursor. The difference is coverage: Normal gives you more room for error; Power asks for much more precise placement.
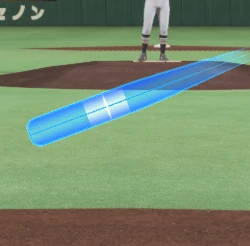
Normal Swing · Larger target
Use it with two strikes, when a ball in play matters, or while you are still learning a pitcher’s movement.
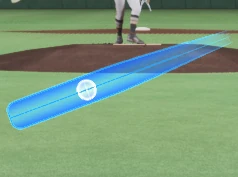
Power Swing · Smaller target
Use it when you are ahead, expect a specific pitch, and can attack a location where the batter can do damage.
Make the Choice from the Situation
| Situation | Default choice | Why |
|---|---|---|
| Learning the pitcher | Normal Swing | More coverage leaves attention available for pitch recognition. |
| Two strikes | Normal Swing | Protecting the zone matters more than maximum damage. |
| Ahead in the count | Power Swing—if you have a target | You can reject pitches outside your chosen area. |
| Runner must advance | Normal Swing or bunt | Reliable contact and placement matter more than extra-base upside. |
Move the Cursor to the Ball—not to the Whole Zone
Do not sweep the cursor around before you have read the pitch. Hold your starting position, follow the ball marker, then make one controlled move. Centered contact is the goal; catching the ball on the cursor’s edge usually produces a weaker or less predictable result.
- Recognition decides whether to swing.
- Cursor placement decides how cleanly you meet the ball.
- Timing decides whether the contact is early, centered, or late.
The Most Tiring—and Least Effective—Habit
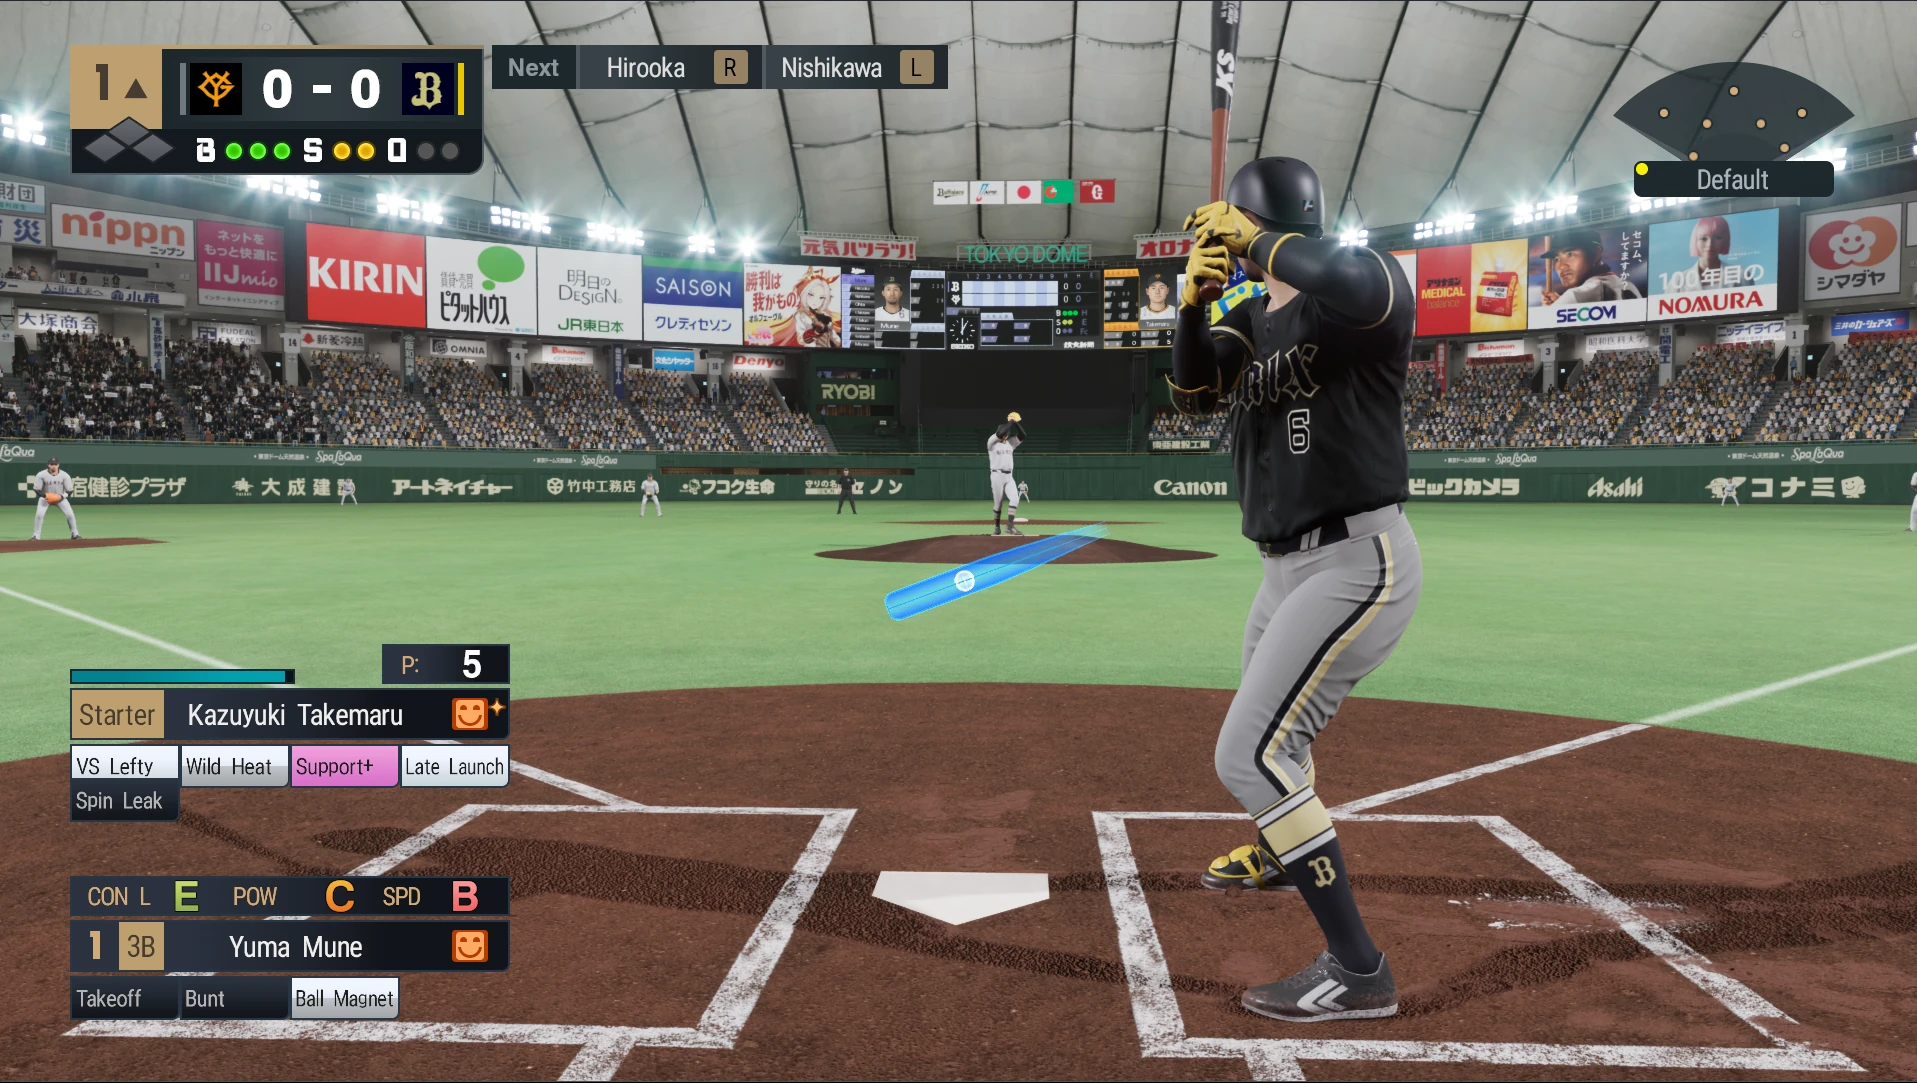
Trying to cover the entire strike zone with Power Swing makes recognition, cursor movement, and timing harder at the same time. Shrink the area you are willing to attack before you shrink the cursor.
Bunt Only with a Clear Purpose
Hold R2 before the pitch to square around. The horizontal bat cursor shows the zone currently covered by the bat. Move it toward the pitch and think about placement, not power.
- Use a bunt when advancing a runner or creating infield pressure is worth the out risk.
- Do not bunt simply because a full swing feels difficult.
- If the situation does not reward a sacrifice, return to a normal at-bat plan.
Read the Matchup Before the Pitch
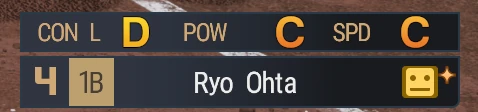
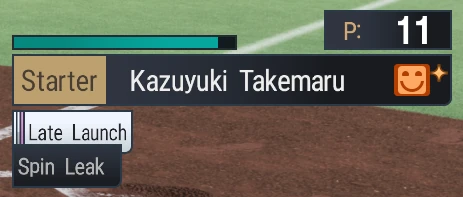
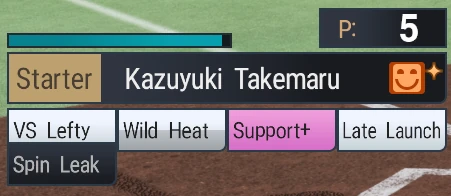
The lower HUD helps decide how much risk the at-bat can support. Read only the information that changes the next pitch.
Direct the Swing When the Pitch Supports It
| Input | Intent | Use it when… |
|---|---|---|
| × | Pull-side swing | An inside or middle pitch lets you get the barrel out in front. |
| ○ | Opposite-field swing | An outside pitch can travel deeper before contact. |
| R1 | Switch Normal / Power | You need different cursor coverage before the pitch. |
The input expresses intent, not a guaranteed result. Pitch location and timing still determine where the ball travels.
Diagnose One Thing After Every Miss
- Chased the wrong pitch: tighten the area you are willing to attack.
- Cursor missed the ball: reduce movement and use Normal Swing until placement settles.
- Early or late contact: keep the same target and adjust only the swing timing.
- Wrong intent: choose contact, power, or bunt from the game situation before the next pitch.
Controls and Optional Reference
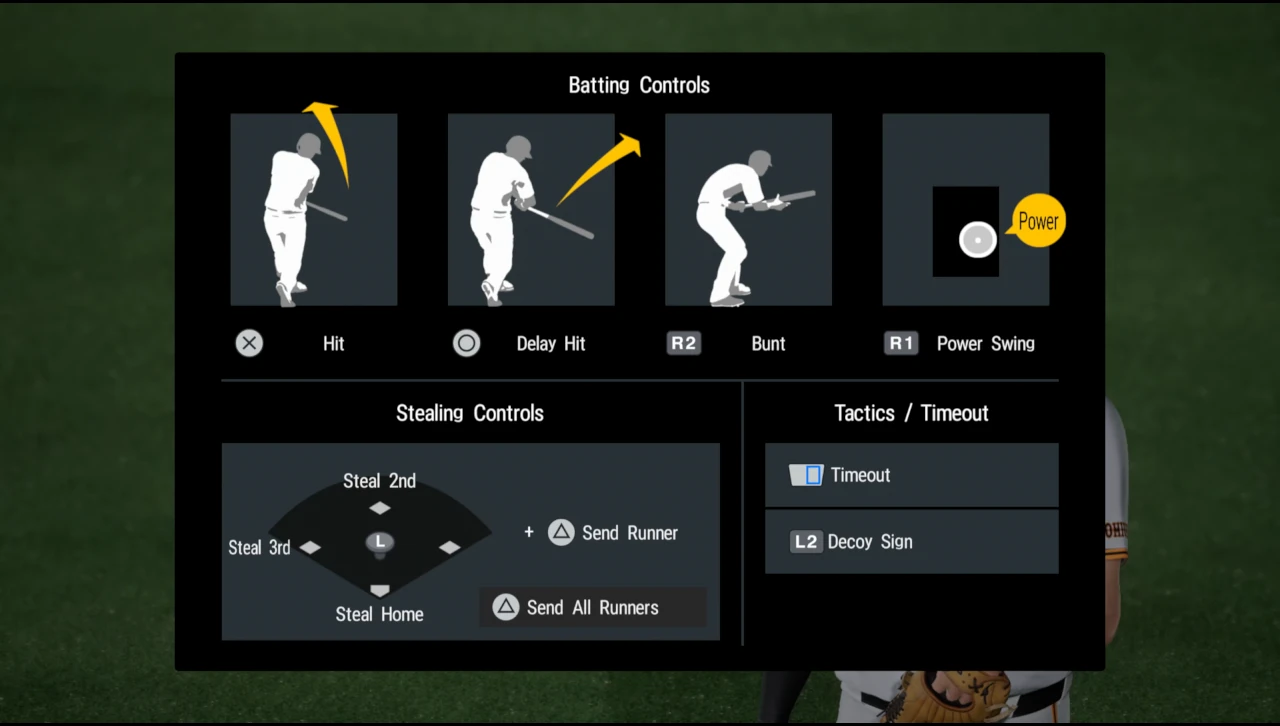
- Where can I see the full current batting controls?: Use the official 2026 control sheet below for cursor movement, pull and opposite-field swings, R1 cursor switching, R2 bunting, runner commands, timeout, and Decoy Sign.
- What about older bunt variations?: Older guides describe standard, drag, push, and drag-push bunts based on cursor choice and R2 timing. These exact variants are not part of the beginner method above because they still need direct confirmation in the 2026 release.
- What do older trajectory labels mean?: Grounder, Low, Middle, High, Line Drive, Arc, and Power Hitter describe typical batted-ball shapes in older player-profile help. Treat them as player tendencies, not as a replacement for pitch selection, cursor placement, and timing.
2026 Batting Controls
Keep this sheet as a lookup rather than something to memorize before learning the at-bat. The four-step approach above is enough to begin: choose a zone, read the pitch, choose the cursor, then diagnose the result.
The Repeatable At-Bat
- Choose a zone before the pitch.
- Read the ball before moving the cursor.
- Use Normal Swing by default and earn the right to use Power Swing.
- After a miss, correct one cause instead of changing everything.